
Banking services have evolved dramatically, offering unparalleled convenience through digital platforms. Gone are the days of needing to visit a physical branch for every transaction. Bank of India (BOI), a leading public sector bank, provides a robust net banking service that lets you manage your finances from anywhere, at any time. Activating this service is a simple process that unlocks a world of financial freedom.
Net banking not only simplifies routine tasks like checking your balance and transferring funds, but it also provides a secure and efficient way to handle a variety of financial needs. With just a few clicks, you can access account statements, manage your debit card, order a new chequebook, and so much more. This article will guide you step-by-step on how to activate Bank of India net banking quickly and securely.
Activating Your Bank of India (BOI) Net Banking Online
You may have heard about net banking, but aren’t sure where to start. The process is straightforward, whether you’re a tech-savvy user or new to online banking. All you need is your customer ID and access to the email address and mobile number registered with your bank account. If you don’t know your customer ID, you can easily find it on the front page of your bank passbook.
Once you have your details ready, you’ll be able to complete the entire activation process from the comfort of your home, without any need for a branch visit. The following steps will walk you through the entire journey, from the initial login to setting up your personalized credentials.
1. Visit the Official BOI Website
Open your web browser and go to the official Bank of India website. On the homepage, click on the “Internet Banking” option, and then select “BOI Online Omni Neo Login.”

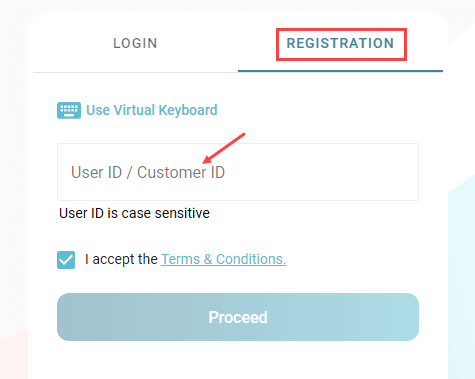
2. Start the Registration Process
On the login page, click on the “Registration” option. Enter your Customer ID and click “Proceed.”
3. Verify Your Identity
You will be prompted to enter a One-Time Password (OTP) sent to your registered email ID. Enter the 6-digit OTP and click “Verify E-Mail OTP.” Next, you’ll receive a separate OTP on your registered mobile number. Enter this OTP and click “Verify Mobile OTP.”

4. Authenticate Your Account
To authenticate your identity, select the “Debit Card” option. Enter your debit card number, expiry date, and ATM PIN, then click “Verify Details.” Alternatively, if you have mobile banking activated, you can select the “M-PIN” option and enter your mobile banking PIN.

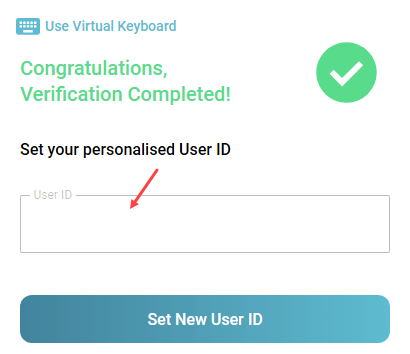
5. Set Up Your Login Credentials
After successful verification, you will be directed to a screen to create your new login credentials. Click on “Set New User ID,” enter your desired User ID, and click “Proceed.
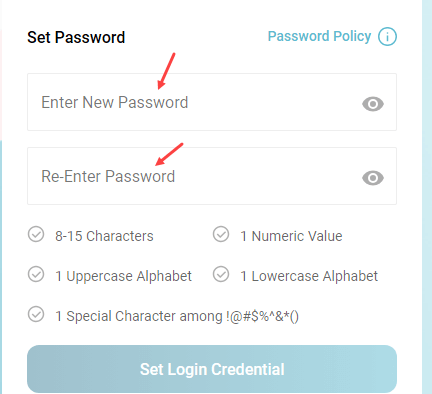
Then, set a strong Login Password that meets the specified criteria and submit.
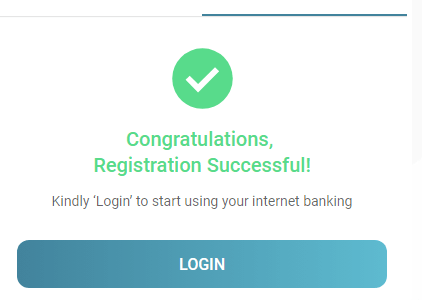
Congratulations! You have successfully activated your Bank of India net banking service. You can now log in using your newly created User ID and Password to access a full suite of online banking services.
Final Words
If you need to enable full transaction rights, you can do so by navigating to the “Profile” section within your net banking account. However, if you followed all the steps correctly, your transaction rights should already be enabled. For a seamless banking experience, remember to keep your login credentials secure and never share them with anyone.
FAQ
Q1: What if I forget my customer ID?
A: Your customer ID is printed on the front page of your Bank of India passbook. If you cannot find it, you can contact your nearest BOI branch for assistance.
Q2: Can I activate net banking without a debit card?
A: Yes. If you have BOI mobile banking activated, you can use your Mobile Banking PIN (M-PIN) to verify your account during the activation process instead of using your debit card details.
Q3: How long does it take to activate net banking?
A: The entire process can be completed in just a few minutes, provided you have all the necessary information, like your customer ID and access to your registered email and mobile number.