
Effortless money transfers have become the backbone of modern banking. With the Bank of Baroda mobile banking app (bob World), you can seamlessly manage transactions and send money with just a few taps. However, before initiating any transfer, it’s necessary to register the recipient as a beneficiary.
Adding a beneficiary account is crucial to ensure secure and verified transactions. Whether you’re transferring funds within the same bank or to other banks, this step acts as an additional layer of security, safeguarding your money from unauthorized access. This guide explains how you can add a beneficiary in the bob World app in a few simple steps.
Steps to Add a Beneficiary in Bank of Baroda Mobile Banking
Here I’m gonna tell you how to add a beneficiary bank account for money transfer in the Bank of Baroda mobile banking app (bob world). If you want to transfer money to any bank account through NEFT, IMPS, and RTGS from bob world mobile banking, first you need to add a receiver bank account as a beneficiary.
Once the beneficiary is added and verified, you can initiate money transfer. So let’s add a beneficiary account first:-
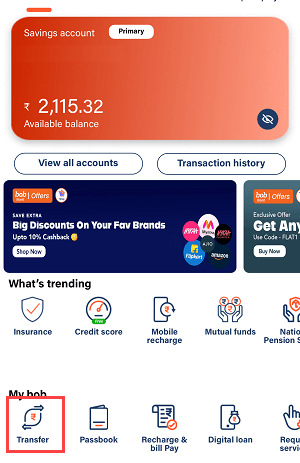
Step 1: Login and Select Transfer
Start by logging into the Bank of Baroda mobile banking app (bob World) using your credentials. Once logged in, locate and tap on the Transfer option on the home screen.
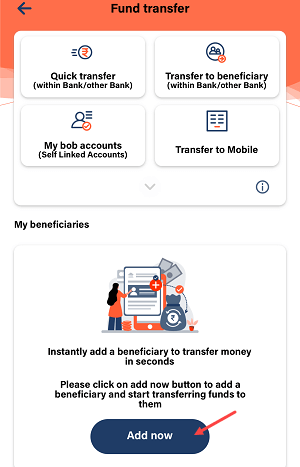
Step 2: Access the Add Beneficiary Option
If no beneficiary accounts are linked yet, an Add Now option will appear. Tap on it to proceed.
For users who already have beneficiaries added, tap on View All and choose the Add a New Beneficiary option.
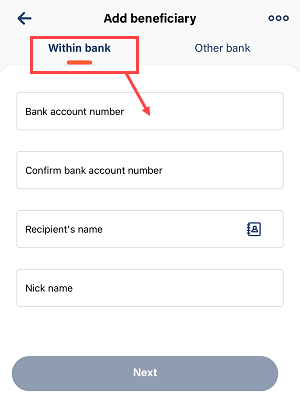
Step 3: Add a Beneficiary with Bank of Baroda Account
If the recipient’s account is with Bank of Baroda, select the Within Bank option. Enter the beneficiary’s account number and name and submit the details.
Note: You don’t need to provide the IFSC code for Bank of Baroda accounts.
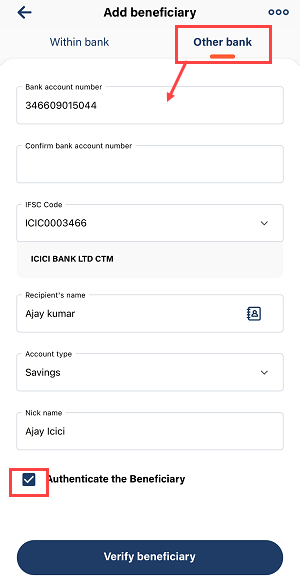
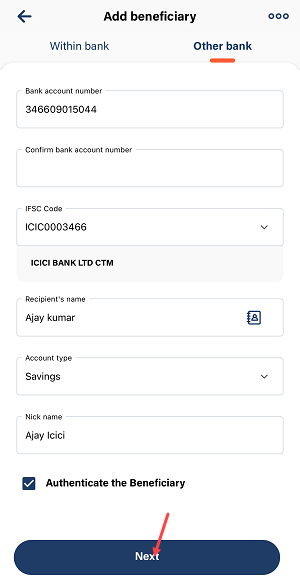
Step 4: Add a Beneficiary with Other Bank Account
For recipients with accounts in other banks, select the Other Bank option. You will need to provide the following details:
- Beneficiary’s account number
- Beneficiary’s name
- The bank’s IFSC code
- An optional nickname for easier identification
Once the information is filled in, select Authenticate Beneficiary and tap on Verify Beneficiary to proceed.
Step 5: Verify and Proceed
On the verification screen, ensure the provided details are accurate. Tap on the Next button to move forward.
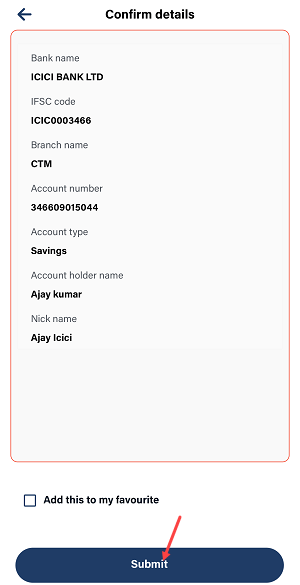
Step 6: Review and Submit Beneficiary Details
Carefully review the beneficiary’s account information on the next screen. If everything is correct, tap Submit to finalize the process.
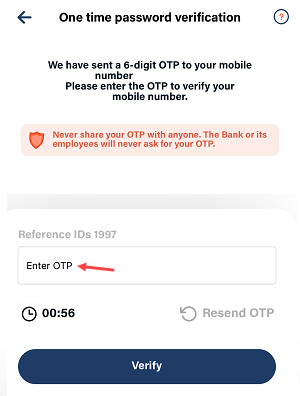
Step 7: Enter OTP for Confirmation
An OTP will be sent to your registered mobile number. Enter the OTP into the app to confirm the addition of the beneficiary.
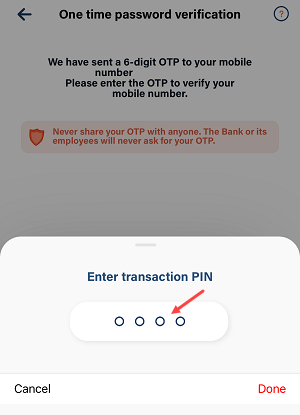
Step 8: Enter Transaction PIN
To complete the process, enter your transaction PIN and tap on Submit.
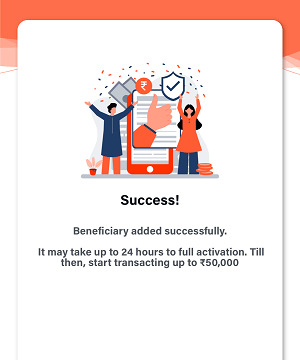
Step 9: Beneficiary Successfully Added
Your beneficiary account has now been added successfully. It will be activated after 4 hours.
Transfer Limits After Adding a Beneficiary
After the activation period, you can start transferring money.
- Within 5 hours, you can transfer up to ₹50,000 using IMPS or NEFT.
- After 24 hours, the limit increases to ₹5 lakh through IMPS and ₹20 lakh through NEFT.
Adding a beneficiary account is a simple yet essential process to ensure seamless transactions in the Bank of Baroda mobile banking app. Follow this guide to set up your beneficiaries and enjoy the convenience of quick and secure fund transfers.